Pickup locations
Add the farm stand, market or drop site where members collect their boxes.
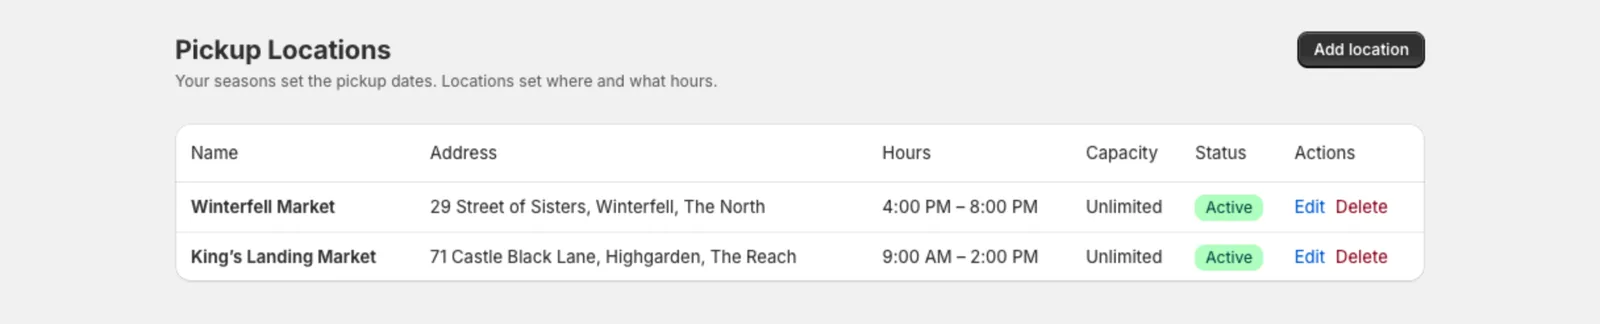
Pickup locations are the places members collect their boxes: your farm stand, a farmers market, a neighbourhood drop site. Members choose one when they sign up.
Your seasons set the pickup dates. Locations set where and what hours. Members in a season pick up on that season’s dates, whichever location they choose (see Seasons and delivery dates). If a location picks up on different days, give it its own dates.
Add a location
- Go to Copia → Pickup Locations and click Add location.
- Fill in:
- Location name: what members see, like “Saturday Farmers Market”
- Address
- Days you’re open (optional): only matters when it adds something to your season’s dates, like a farm stand that’s open all week. Once you tick days, Show these days on the signup form appears (on by default). See Hide the days you’re open.
- Pickup hours, like 9am–1pm. Members see this so they know when to come.
- Pickup instructions (optional), like “Look for the green tent near the north entrance”
- Schedule shown to members (optional): your own wording for when to come, like “Quarterly pickups, 10 AM – 6 PM”. See Write your own schedule.
- Member capacity (optional): the most members per delivery date. Leave it blank for no limit.
- Cutoff (days before) and Locks at (optional): when signups and member changes close for a box at this location. See Give a location its own cutoff.
- Click Save.
Offer a location in some seasons only
By default, every season offers every location. To limit a season to certain locations, tick them under Pickup locations on the season’s page. This is how you run different pickup days at different locations. See Offer a season at some pickup locations only.
Give a location its own dates
When your locations pick up on different days, give each one its own dates in the season.
- Go to Copia → Seasons and click Edit on the season.
- Under Location dates, click Set dates next to the location.
- Click each date on the calendar. Add every date this location has in the season, not just the next one.
- Click Save.
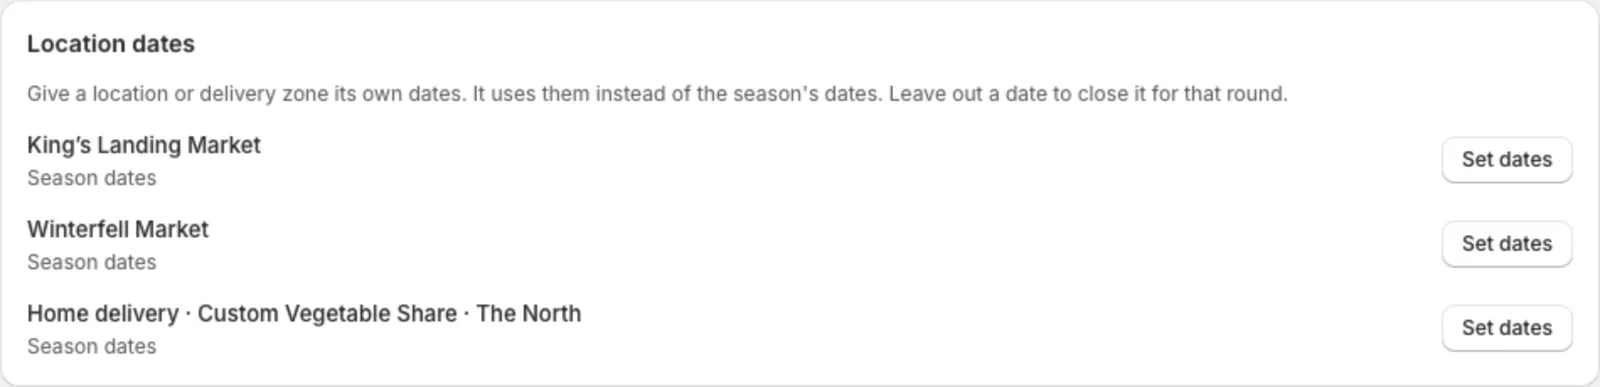
Details are on Seasons and delivery dates, including what happens to boxes when you save.
Give a location its own cutoff
Most locations can use your share type’s change cutoff. If one needs to close earlier or later, like a market you can sell for until the afternoon before, set its own.
- Go to Copia → Pickup Locations and click Edit on the location.
- Set Cutoff (days before), then pick Locks at.
- Click Save.
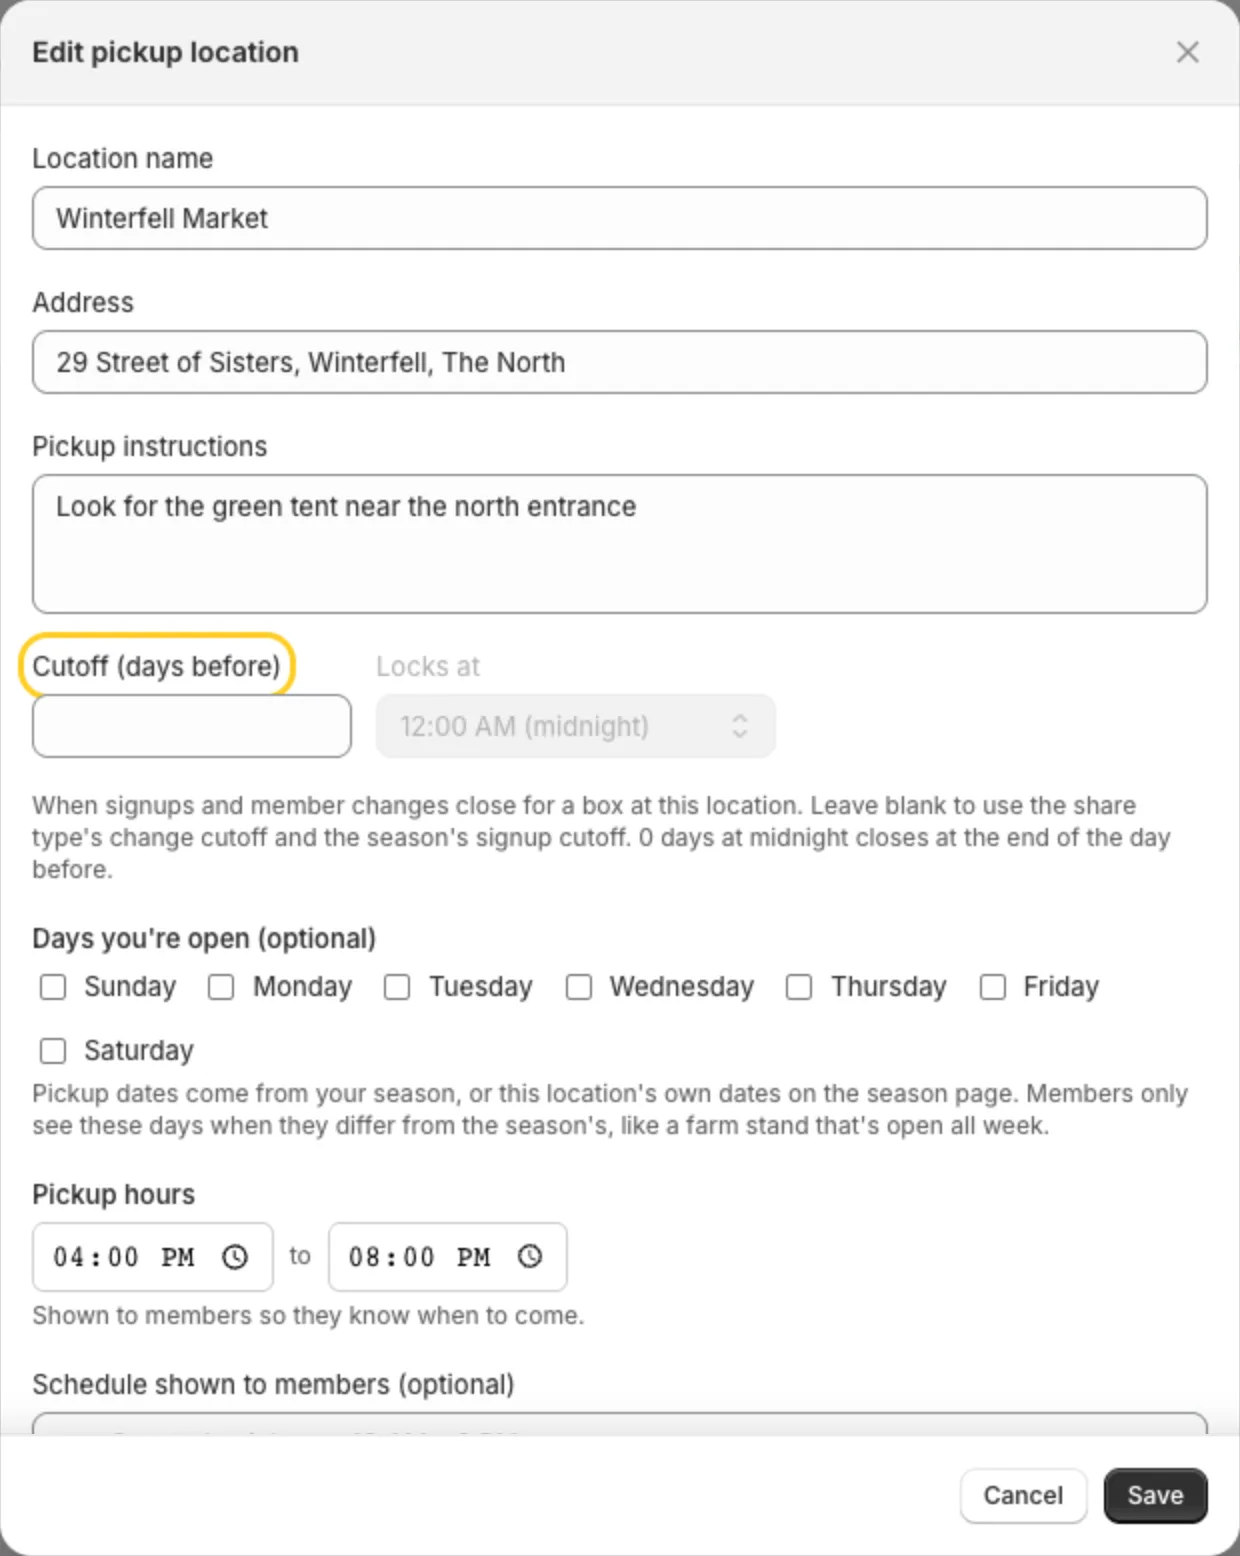
This replaces both the share type’s change cutoff and the season’s signup cutoff for boxes at this location. Leave Cutoff (days before) blank to go back to using those. See The change cutoff.
How members see the schedule
On the pickup step of the signup form, members see your season’s dates once, above the location cards, like “Pickups on Saturdays, starting Oct 31, 2026”, or every date when only a few are left. When a location in the season has its own dates, that line goes away and each card shows its location’s dates instead.
Each card then shows that location’s hours, like “9:00 AM – 1:00 PM”.
A card only mentions the days a location is open when they differ from the pickup days:
- A farm stand open all week, with Saturday pickups, shows “Open every day, 10:00 AM – 6:00 PM”.
- A market open Saturdays, with Saturday pickups, just shows its hours.
- Three or more days in a row show as a range, like “Open Monday – Friday”.
Times show as 12-hour, like “10:00 AM – 6:00 PM”.
Tip: If a location is set to open on a day your season doesn’t pick up, like a Saturday market in a season of Sunday dates, the season’s page warns you. Members would see “Open Saturday” next to Sunday dates, so fix whichever one is wrong.
Hide the days you’re open
Maybe a location is open every day, but members should only come at set pickup times. Edit the location and untick Show these days on the signup form. The card then shows only the hours, like “10:00 AM – 6:00 PM”, not “Open every day · 10:00 AM – 6:00 PM”.
The days stay saved for you. On the Pickup Locations page, the Hours column lists them under the hours with “(not shown to members)“.
Write your own schedule
Want different wording on a location’s card? Type it in Schedule shown to members, like “Pickups at the back door, 10 AM – 6 PM”. It replaces the hours (and open days) in the signup form, the member portal and emails. Leave it blank to show the hours.
On the Pickup Locations page, the Hours column shows your wording for that location. Otherwise it shows the hours, with the days you’re open first when you’ve set them, like “Every day, 10:00 AM – 6:00 PM”.
Where locations show up
- In the signup form, as cards members choose from, under the season’s pickup dates or with their own. Only the locations the chosen season offers appear.
- In the member portal, with the next box
- In delivery and reminder emails, with the hours and instructions
- On the pack list, grouped by location so each site’s boxes are packed together
- At check-in, so you can see who’s due at each location
Changing or removing a location
Click Edit to change any detail. Members at that location see the update in their next email.
Before you delete a location, move its members somewhere else from their member pages. Deleting a location also takes it off any season that had it ticked. If it was the only one ticked, that season goes back to offering every location.
Tip: Only do home delivery? Hide Pickup Locations from the Copia menu in Settings → Navigation, and turn pickup off in your share type’s Fulfillment options.